Biggles2010
-
Posts
130 -
Joined
-
Last visited
-
Days Won
8
1 Follower

Recent Profile Visitors
1,146 profile views


Biggles2010's Achievements
")


-
Updating deletes macros
Biggles2010 replied to Biggles2010's topic in FSUIPC Support Pete Dowson Modules
I did as you suggested, but first went a stage further and uninstalled FSUIPC 6.18 and recreated the situation prior to my problem, with the 6.10 version installed into My Documents for P3D4 only, and then ran the 6.18 update, installing to the same folder to cover P3D4 and P3D5. All went perfectly with macros and config preserved. I then reinstalled 6.18 again into C:\ FSUIPC and that also went as expected, with the relevant files preserved and then transferred to the new location. My original problem remains unexplained, but it's obviously not due to any changes to FSUIPC which is once again running as reliably as ever. Thanks for your help and sorry to have taken up your time with this. John B. -
Updating deletes macros
Biggles2010 replied to Biggles2010's topic in FSUIPC Support Pete Dowson Modules
The details are somewhat different. Link below. https://forum.simflight.com/topic/94222-macro-and-control-setting-lost-with-update-fsuipc6/?do=findComment&comment=571412 Immediately before the FSUIPC update, all macro related cockpit functions were working, using FSUIPC 6.1.0. Therefore the macro files must have been in place. Then immediately after the update, control functions had been lost and the macro files had gone. Between those points, nothing else was installed, uninstalled or changed by me I've attached logs, but as you say, there's nothing obviously related to macros. I have used FSUIPC in various versions for the last 20 years on many computers. However, I built this computer 2 years ago and made a new purchase of FSUIPC 6.0 which was installed in the recommended location in My Documents/ P3D4 addons and has remained there. I made a new installation of P3D4.3 in its own folder on the C drive. (note, there has never been a Modules folder on this computer). New mouse macros were created and all cockpit functions were set up again from scratch. I did not carry forward anything from previous versions of FSUIPC. I subsequently updated FSUIPC to 6.05 and then 6.10 and P3D was updated to 4.5 HF3. All without any problems. Recently I installed P3D v5.3 on a seperate nvme D drive, retaining the existing P3Dv4 setup on C drive. The new P3d5 installation was tested and working, but without any cockpit controls because FSUIPC was not yet installed for it. At this point, the cockpit was still fully functional using the older P3D4 and FSUIPC 6.10 installation. I then downloaded the latest update for FSUIPC which was 6.18 and nominated to install for both versions of P3D. It asked to uninstall the existing 6.10 version and I accepted. The install proceeded normally, into the same folder as previously. I then tried the cockpit in P3Dv4 and P3Dv5 and found most cockpit functions had been lost. Then as I had said previously, on checking the ini file all the macro related items were showing as Unknown and in the main FSUIPC folder the macros had disappeared. While there is no instruction in the uninstall / reinstall process to remove macros, it appears to have triggered something which has caused that effect. I have no idea what that could be. InstallFSUIPC6.log UninstallFSUIPC6.log -
John/Pete I thought this problem was just on my system, but I see there is a previous post on this same topic. I run a home cockpit, previously with P3D4.5 Win 10 and FSUIPC 6.10 and around 200 functions programmed via mouse macros which have worked faultlessly. I decided to install P3D 5.3 on a seperate drive, while also retaining the original P3D4 installation. No problems with that, but I also updated FSUIPC to 6.18. I selected to apply it to P3D4 and P3D5. Quote from install Guide: "If you already have either FSUIPC5 or FSUIPC6 installed for P3Dv4 or P3Dv5 (or both), then the installer will first uninstall this/these installation(s). Only the files installed by the FSUIPC5/6 installer will be removed, and other files ( .INI and .KEY files, lua scripts, macro files, etc) will be preserved so that they can be re-used." This was not the case. All macro files were deleted. The ini was preserved but with all the functions relying on macros showing as Unknown Macro. This had never happened before with any FSUIPC update. Fortunately I had a backup of most of the macro files, but this was a panic I could have done without. Could you please have a look at the update functionality. It seems like something may have changed. Thanks, John B.
-
I got around the takeoff trim problem in my home cockpit by a small change to the aircraft config file, which I had previously posted on this forum (see copy text below). I have not experienced the trim switch issue because I used FSUIPC to assign the standard trim up/trim down commands to my yoke trim switch, which gives me realistic operation. ------------------------------------------------------ I use the E195 exclusively and have spent a lot of time playing with config settings for a better rotation. The two issues for me were the reluctance to unstick at Vr, requiring too much positive trim to achieve rotation, followed by excess pitch up once airborne as result of higher trim setting. Recently I tried a different approach, looking at the contact points. I reasoned that moving the contact points for the mainwheels forward might help. Bingo! In the aircraft config the standard settings are point.1 = 1, -9.0, -9.0, -11.75, 2300.0, etc. point.2 = 1, -9.0, 9.0, -11.75, 2300.0,etc. My modified settings are point.1 = 1, -7.0, -9.0, -11.75, 2300.0, etc. point.2 = 1, -7.0, 9.0, -11.75, 2300.0, etc. This change has no effect on visual appearance. It simply makes the aircraft more willing to rotate at more realistic (lower) trim settings. Where previously it required up to +5.0, I was able to reduce takeoff trim to +2.0 with a smoother rotation and better transition to climbout. I have not found any adverse effects from this change. Usual disclaimer - make a backup of config before editing. Once off the ground the contact points have no effect on flight dynamics, but the lower trim setting avoids the excessive nose up pitch change after lift off. Landing characteristics are unchanged, but it seems to have a slight benefit of allowing the nosewheel to be lowered more slowly. ------------------------------------------------------------ I always suggest making a copy of the original config file as a fallback before making changes.
-
As a long time user and supporter of the Ejets series I have often tried to help other users on this forum. Are we no longer welcome to do so? Previous to this response from FeelThere, I had already responded and posted a direct link to the Ejets manual, taken from the FeelThere product page. My post has been removed and the above reply, from FeelThere has been substituted, leaving the OP to do his own searching. The OP is clearly not familiar and had already said he purchased from SimMarket, where the download page provides no information at all about accessing the manual. Is there a problem posting a link?
-
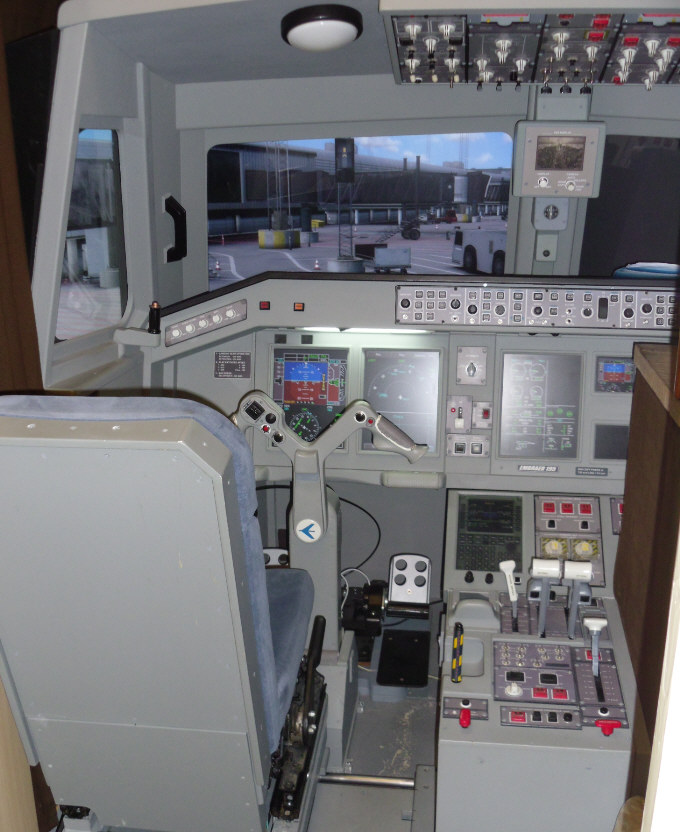
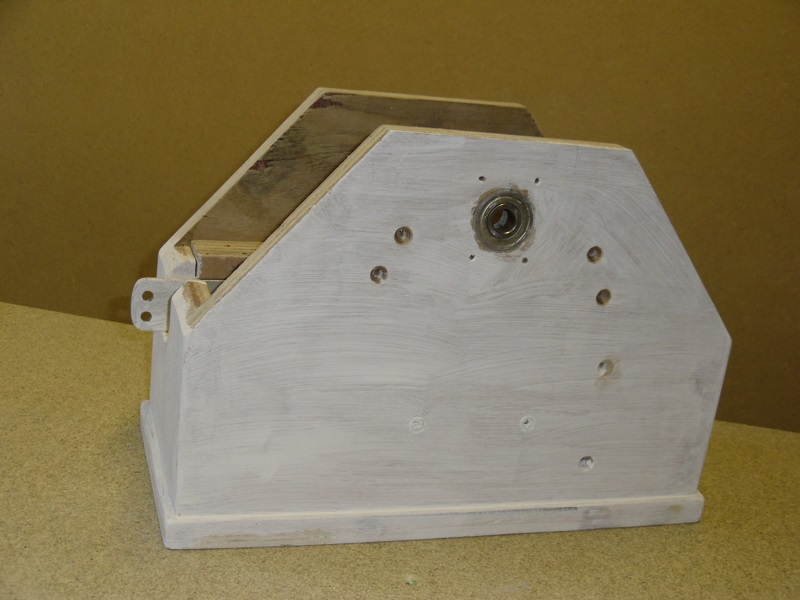
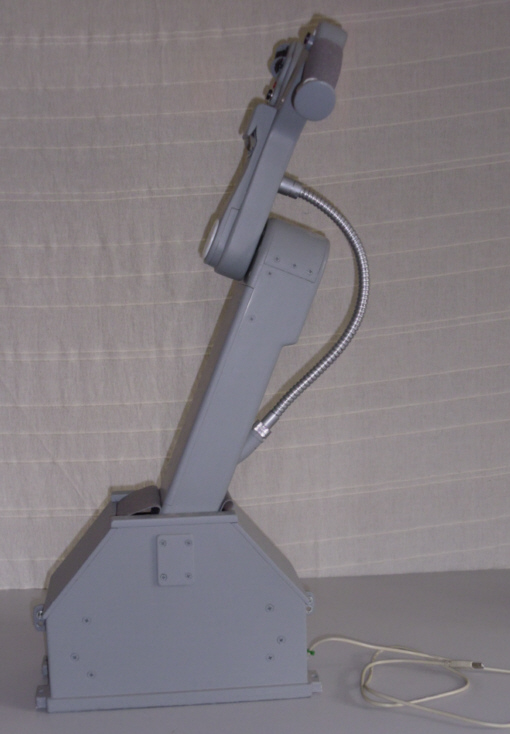
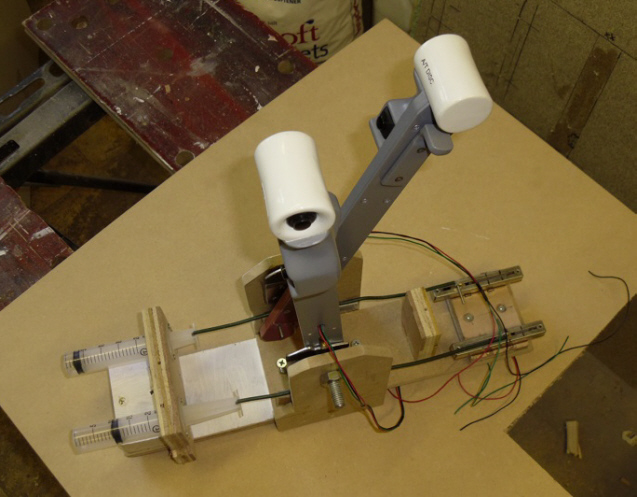
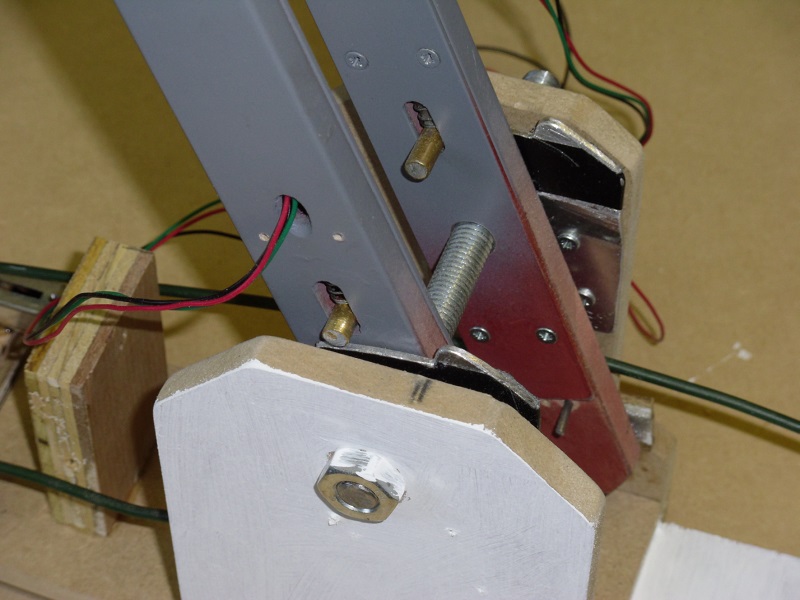
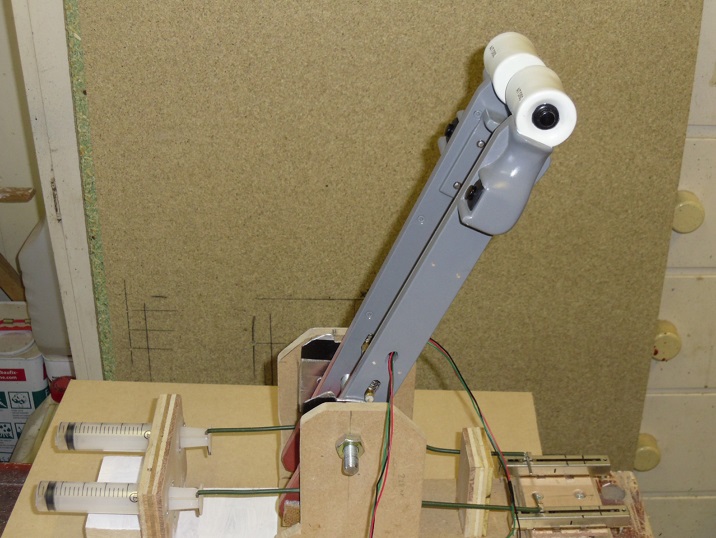
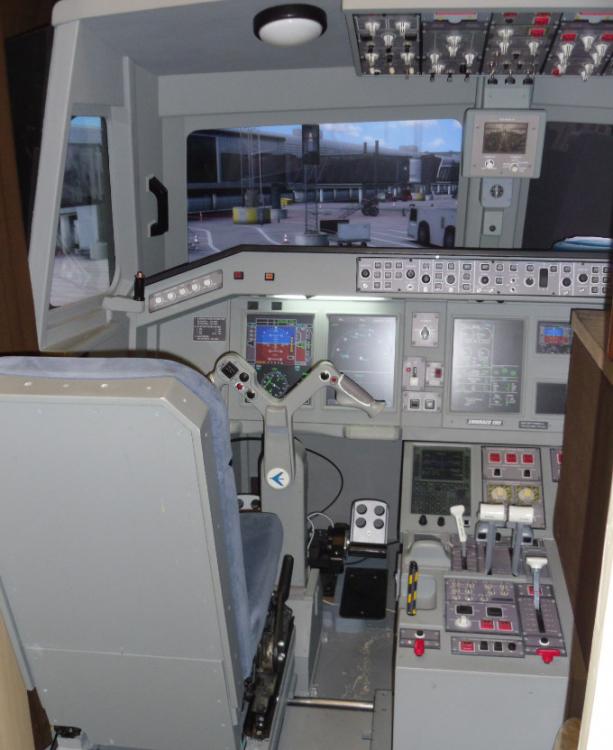
Sorry for delayed reply, been away for a couple of days. The cockpit is home built using proprietary buttons and switches and Leo Bodnar interface cards. Relatively low cost using mdf board and plywood for most of construction. Total cost was about £700 plus monitors and fairly high end pc. Flying controls also home built. Main thing there is to use good size axis shafts and bearings and industrial grade potentiometers or hall effect sensors. The whole project was fairly straightforward, although I had about fifty years of building model aeroplanes and other stuff before I started the sim. The forum has limits for images, but I've attached a few pics of the yoke and throttles. If you are going to start building, let me know and I can provide a lot more details. I was restricted for space so I made a couple of changes to the MIP for easier single handed operation, but everything works as intended.


-
You were pretty quick getting that checked out. I agree it would not be so convenient for many users, but having the CDU always available, I just select the NAV page and rotate the knob. As I said I found it by accident when I was setting up the cockpit and at first thought I had made a wrong assignment until I worked out what was happening.
-
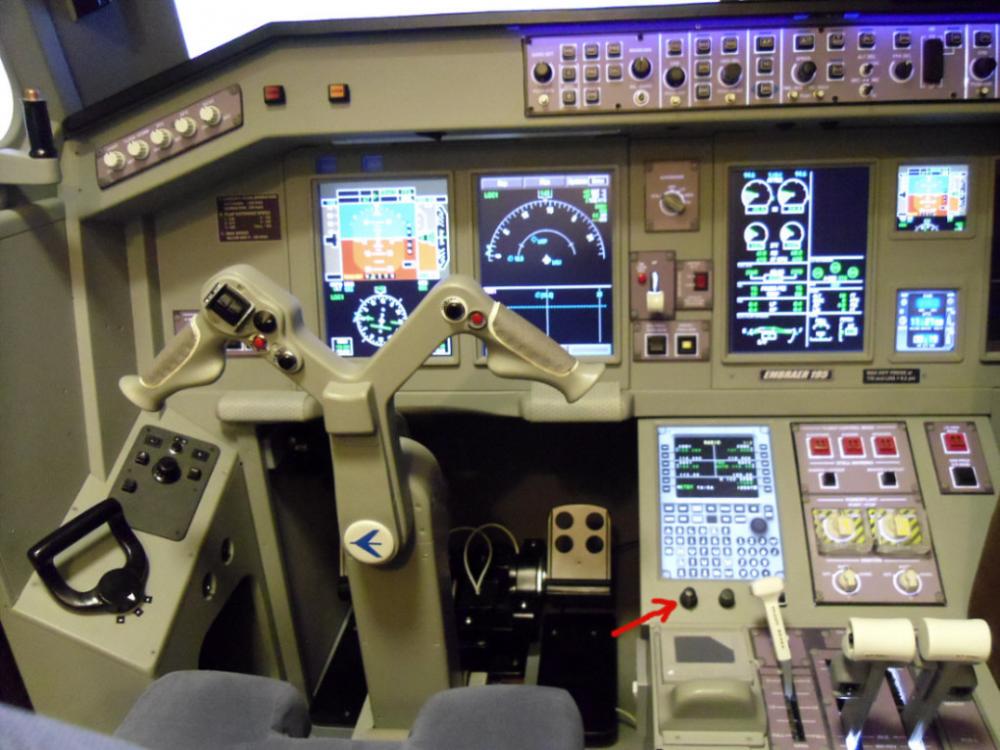
It's possible using mouse macros and very simple, but the way to do it is totally obscure and something I found by accident when building my cockpit some years ago. I use a touchscreen for the MCDU with 2 rotary controls just below it to set frequencies. These are mapped to the double rotary on the MCDU popup using FSUIPC mouse macros with one rotary for full numbers and the other for the decimals, each rotary giving increase and decrease. Now for the obscure bit. With the RADIO page on the MCDU they control the frequencies according to the LSK selected. When the NAV page is selected on the MCDU I discovered the rotary for the whole numbers now controls the map range, up and down. Don't ask me why, but it works. Edit: I should add that the rotaries I used operate like switches, not like a continuous axis control.
-
Yes, it's rather a shame it's all gone very quiet lately. I use the E195 exclusively and have spent a lot of time playing with config settings for a better rotation. The two issues for me were the reluctance to unstick at Vr, requiring too much positive trim to achieve rotation, followed by excess pitch up once airborne as result of higher trim setting. Recently I tried a different approach, looking at the contact points. I reasoned that moving the contact points for the mainwheels forward might help. Bingo! In the aircraft config the standard settings are point.1 = 1, -9.0, -9.0, -11.75, 2300.0, etc. point.2 = 1, -9.0, 9.0, -11.75, 2300.0,etc. My modified settings are point.1 = 1, -7.0, -9.0, -11.75, 2300.0, etc. point.2 = 1, -7.0, 9.0, -11.75, 2300.0, etc. This change has no effect on visual appearance. It simply makes the aircraft more willing to rotate at more realistic (lower) trim settings. Where previously it required up to +5.0, I was able to reduce takeoff trim to +2.0 with a smoother rotation and better transition to climbout. I have not found any adverse effects from this change. Usual disclaimer - make a backup of config before editing. Once off the ground the contact points have no effect on flight dynamics, but the lower trim setting avoids the excessive nose up pitch change after lift off. Landing characteristics are unchanged, but it seems to have a slight benefit of allowing the nosewheel to be lowered more slowly.
-
If the controls you wish to use are recognised by FSUIPC, then it is very easy. Just create mouse macros for the FPA and Vertical Speed functions and assign them to the controls. All the instructions are in the FSUIPC documentation.
-
Thanks Ariel, understood.
-
Feelthere Embraer v3_Center of Gravity/CG?
Biggles2010 replied to Christoph112233's topic in Airplanes
Trial and error. CofG modelling and aircraft dynamics are not what they could be. Varies between models, but trim settings are likely to be quite different to the real aircraft. -
In the course of trying some things for another poster, it highlighted 3 seperate issues. 1. Shutting down the APU brings up immediate shutting down message on Eicas, but then nothing happens for 45-50 seconds. Only after this long delay does the APU start to run down. On previous versions It reacted much more quickly, which seemed a more likely response. 2. After shutting down an engine in flight, it is not possible to restart it by any means. I'm not sure about the real Ejets, but most jets have the ability for a restart in the air, although it may be restricted by company SOPs. Could engine restart in the air be implimented? 3. Flying an assymetric approach in the v3 E195 could be called challenging. Even at very light weight, the minimum control speed with around 95% power on one side is in excess of 170 kts. On an approach, using a 20 kts increase in vref, it still runs out of rudder with even small power adjustments. This was with the rudder scalar increased to 1.2. I was flying manually, because the AP gave up trying to maintain directional control as the speed reduced. Modern airliners have pretty good assymetric performance, but this was more like a Gloster Meteor, renowned 70 years ago, for killing pilots trying to land after an engine failed. I know Feelthere did not design the v3 Ejets for single engine flying, but these characteristics are part of the overall flight dynamics, which could be better.
-
I understood your original post and video. As I said, I tried yesterday using each of the scenarios you described. In each case the engines shut down on the engine stop switches. Trying an engine shutdown in the air was for my own interest to confirm it still worked. I just tried again - Cold and dark start, short flight, land, clean up. Then shut down engine 1, started APU and shut down engine 2. Both engines shut down normally. What controllers are you using? I don't see any mouse cursor on the stop switches in the video, so have you programmed some buttons or switches. Have you checked for any duplicated control assignments. You say the shutdown problem only occurs after a flight, so things to check first would be any assignments for things used specifically in flight, like spoiler, autobrake, landing gear and flaps etc. The throttles look OK because if they were not at idle for shutdown, the Eicas would show a warning.
-
P3D 4.5 HF3 E195 v3 SP2 - engines shutting down normally after a flight. Engine Stop switches operate with or without pumps running. Tried in flight and engine stop switches operate to shut down, providing AT off and throttle at idle. HOWEVER - engine will not restart in the air under any circumstances. Throttle at Idle, I tried these options - Ign Overide/Auto, APU on/off, speeds from 160 to 240, gear up/down.