

GaryGB
-
Posts
3,123 -
Joined
-
Last visited
Content Type
Profiles
Forums
Events
Gallery
Downloads
Posts posted by GaryGB
-
-
Hi All:
Occasionally in moments of haste, I forget that there are no page sequences or other safeguards that I can recall seeing in the SimFlight forums that provide a threshold for determining the age of visitors, other than the signup process for forum participant registration requiring a declaration that users be 13 years of age or older.
Although those kinds of thresholds might be a valuable consideration for the future in what I believe is otherwise primarily a forum frequented by people over 21 years of age, it is probably still prudent for us to provide brief cautions and disclaimers with links we may post which direct visitors to potentially objectionable content for younger or more sensitive internet users.
I apologize for not having initially posted a precautionary statement with the link to begin with, since there may be persons who might be offended by the subject of the video, or its original and fake subtitle dialog. :cry:
Thinking further now on the subject, and the fact that Francois considered it more appropriate to not have the link appear in the forum system at all, I am certainly not offended at the extra measure of consideration which he showed for other's possible responses to the video; rather I should properly applaud his actions wisely taken with the interests of the widest possible group of people in mind. :D
However much the video in question may have been intended as a good-natured and very silly satire (for mature and less-sensitive audiences) of the characters and the subject being lampooned therein, I'm grateful that Francois took the extra step of caution to the extent that he did.
For those who might seek out the video, it contains a short segment from "Der Untergang" (English: Downfall); it is a German film depicting the final days of Adolf Hitler and Nazi Germany in 1945, conveying in a powerful way, the inevitable downfall of the profoundly misguided characters involved in the real world scenarios years ago.
The video has fake superimposed subtitles in English along with the original German soundtrack, and the fictional subtitle dialog is regarding FSX and Hitlers reaction to it, with abundant four letter profanity.
Like anything else on the internet, it is "viewer beware" content which some may find hilarious as a satire; others may not.
My humblest apologies to anyone who may have clicked on the link, and was offended with what they subsequently encountered on someone else's website. :oops:
Although it would have been more appropriate in the more caring environment of the SimFlight Forum System for a link to have been accompanied by a precautionary disclaimer, please be advised that younger or more sensitive internet browser users should always use content protection software (found in most Internet Security firewall products) which can blacklist and prevent display of pages from sites with content that might be deemed objectionable. On the internet, any link can lead to anywhere, and one cannot predict what will end up on one's screen. :idea:
I shall endeavor in the future, though, to use greater discretion in what links to post, and where reasonable doubt may be inferred as to what viewer responses might be, I shall try to remember and post a user precaution and disclaimer.
I am hopeful that all who end up finding and viewing the video will see it as an opportunity to laugh at our essential vulnerability to human foibles and resolve to not make the same mistakes in our own lives; and to lighten up and get a sense of perspective about how "urgently" we pursue our hobbies and creative endeavors as Flight Simmers. :shock:
Kind Regards...
GaryGB
-
Hi all:
If any of you have seen my multiple posts in the SimFlight FSX forum, I feel compelled to inform you that regardless of rumors to the contrary, I had nothing to do with making the infamous FSX/Hitler video, and I don't think JonP was involved either! :twisted:
GaryGB
Sorry Gary, I felt I needed to take it off the forums. Took another post with the same link out too.
Us Dutch are certainly not more catholic than the Pope )as the saying goes), nor am I a puritan, but believe me, I have my reasons.
Happy to explain in private if need be.
Kind regsrds,
Francois
-
:lol: :lol: :lol:
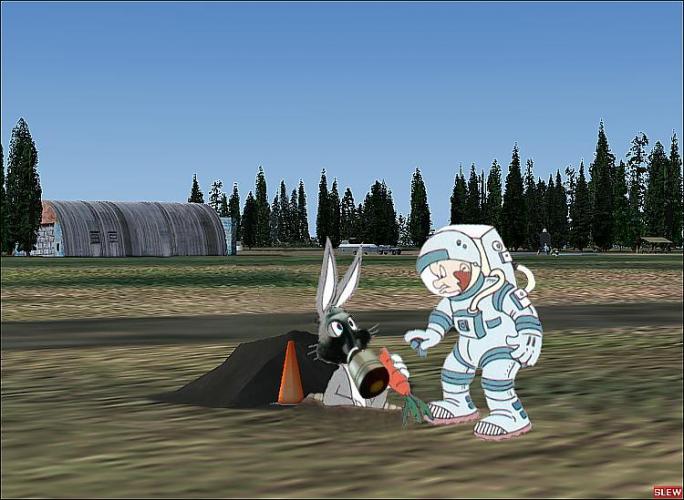
Pretty intense regimen there, Madaz!
We'll just have to see how the moles cope with the barrage... :wink:
PS: Is that your new 'Bou? Looks like a great one to fly! :P
GaryGB
-
Hi All:
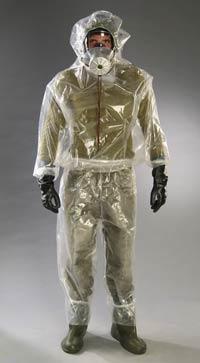
Pups, as designated marketing consultant to the Emma Emporium, is pleased to announce the availability of a new line of hazardous materials attire.
This useful gear may convey a smart and stylish flair while attending barbeques during impromptu overhead sortees as the "Mole Eradication Campaign" is in progress at Emma Field; a must have in case Fritz asks you to go get some more Limberger Bar Cheese from the Clubhouse cellar! :mrgreen:
GaryGB


-
Hi Shamir:
The "cartoon" image above featuring the Embraer Ipanema is a graphic creation using a photograph, not an actual FS2004 aircraft.
It would be a nice one to have, though! Perhaps someone will make us a flyable one someday!
In the mean time, you can try out 2 other comparable types of FS aircraft:
See: http://library.avsim.net/search.php?Sea&Go=Search
and: http://library.avsim.net/search.php?Sea&Go=Search
Maybe CBris could make us a repaint in the tasty green color of the Ipanema for use on the Air Tractor!
GaryGB
-
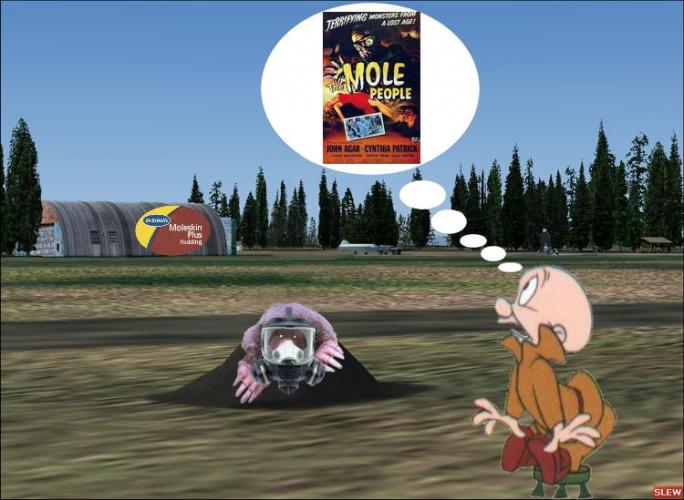
Uncle Elmer, already upset over the smell from the Emma Clubhouse bar cheese, consults the Wabbit on mole eradication methods in cooperation with the anti-pest spraying by CBris and Madaz at Emma Field.
-
Hi Chris:
You probably know more about this than I do, but in case you or others might not have run across this yet, here's a way to quickly browse FS texture image files: :idea:
1.) Download and install Martin Wright's excellent FS graphics utility "Show.exe" from his site: http://www.mnwright.btinternet.co.uk/.
http://www.mnwright.btinternet.co.uk/programs/show.htm
2.) Download and install Martin Wright's newest "mwgfx.dll" file.
http://www.mnwright.btinternet.co.uk/dogfxdll.EXE
2.) Run Show.exe, and in the "Open" dialog, double click a file in the folder of interest.
3.) Maximize the "Browse" window which pops-up, then using the "Up" and "Down" directional cursor movement arrows on one's keyboard, one can scroll through files in the selected folder.
4.) Image Files will immediately display in the right window pane, including various DXT (and DDS?) file formats, allowing one to find things quickly.
Apparently, the green textures for Fritz's mower are derived from the file named "EmmaFiat1.bmp" based on the "HV" logo seen in a picture from the Emma Field User's Manual. :roll:
This file is in the [main FS9 install folder name and location]\Lago\EmmaField\Texture folder.
I can't wait to see what Chris comes up with this time! :twisted:
GaryGB
-
I really must install a paraffin "fogger" - it may not be a good lawnmower, but as a pesticide spreader...There was an "Aerial Spraying" Mod for the Caribou's done..
I'll come up with a .CFG tweak for the Alphasim 'Bou,
and then we can have some liquid fertilizer, or pesticide spread about..
Just have to find a good "Smoke" effect to use
Perhaps a new avenue for the EFFC to gain some funds buy doing aerial spraying under contract
Uh-Oh... the Moles better watch out! :twisted:
GaryGB
-
Hi Chris:
You probably know more about this than I do, but in case you or others might not have run across this yet, here's a way to quickly browse FS texture image files: :idea:
NOTE: Martin Wright's main FS graphics page is here: http://www.mnwright.btinternet.co.uk/graphix.htm
Also check out his Beta page:
http://www.mnwright.btinternet.co.uk/beta.htm (click on yellow dot to D/L)
Watch for a new beta of his extended image format converter "ConvImX" which reportedly enables us to execute a batch conversion of DDS files to DXT3.
1.) Download and install Martin Wright's excellent FS graphics utility "Show.exe". http://www.mnwright.btinternet.co.uk/programs/show.htm
2.) Download and install Martin Wright's newest "mwgfx.dll" file. http://www.mnwright.btinternet.co.uk/grm#Download
2.) Run Show.exe, and in the "Open" dialog, double click a file in the folder of interest.
3.) Maximize the "Browse" window which pops-up, then using the "Up" and "Down" directional cursor movement arrows on one's keyboard, one can scroll through files in the selected folder.
4.) Image Files will immediately display in the right window pane, including various DXT (and DDS?) file formats, allowing one to find things quickly.
Apparently, the green textures for Fritz's mower are derived from the file named "EmmaFiat1.bmp" based on the "HV" logo seen in a picture from the Emma Field User's Manual. :roll:
This file is in the [main FS9 install folder name and location]\Lago\EmmaField\Texture folder.
I can't wait to see what Chris comes up with this time! :twisted:
GaryGB
-
I really enjoy Chris' impromptu repaints and mischievous flyby stunts. :D
And it would also be really cool if he could come up with a repaint for Fritz's mower! :lol:
GaryGB
-
Hey Francois:
...But is the other equipment for mowing as much fun? :roll: :lol: :lol: :lol:
GaryGB
-
Hi All:
I found an interesting video tweak in FSX development team member P-12C Pilot's blog regarding "No More "Blurries?", or what I call 'FSX texture constipation' resulting from a 'low fiber' diet: :wink:
http://blogs.technet.com/p-12c_pilot/ar48111.aspx
Also, it appears the "TEXTURE_BANDWIDTH_MULT=400" tweak was not working due to a FSX bug as discussed in tdragger/Mikes blog: :idea:
https://blogs.msdn.com/tdragger/default.aspx
Cheers!
GaryGB
-
Is that why I see no textures when I pan very quicklly?
Thanks,
LouP
It might be! :lol:
So... have ya' tried them there tweaks yet? :P
PS: :idea: See also the latest video tweak in FSX development team member P-12C Pilot's blog regarding "No More "Blurries?" or what I call 'FSX texture constipation' resulting from a 'low fiber' diet: :wink:
http://blogs.technet.com/p-12c_pilot/ar48111.aspx
GaryGB
-
Hi Lou:
Wait until you see your card can do in FS with a (cautious) overclock using Powerstrip; and besides overclocking (which is entirely optional), the improvement in visual quality that Powerstrip makes possible is astounding! :shock:
How do I know when the card is pulling everything my system can offer it?LouP 8)
PS: Tried those tweaks out yet? If you haven't, FS definitely isn't sending graphics data as fast as your card can take it! :wink:
GaryGB
-
Hi Lou:
I agree with Francois' wise advice as far as one's upgrade course and schedule.
Whereas FS9 mostly makes intensive use of the CPU chip on our motherboards, and may allow somewhat increased use of the GPU chip on our newer video cards, FSX seeks even greater use of the GPU if it can.
However if the video card is older, FS9 (and FSX) writes an "exclude use of that card's 3D acceleration driver(s)" statement for it inside display.cfg located in the FS9 install folder to allow the CPU-based rendering engine to do most of the grunt work on one's machine rather than the GPU.
One must verify that FS9 (and FSX) correctly detected the new video card after having replaced the old one, by checking in the FS9.cfg (or fsx.cfg) file with notepad or other text viewer by looking at the "[DISPLAY.Device.cardname goes here.0]" statement (between the [sOUND] and [DISPLAY] sections) located in the C:\Documents and Settings\Administrator\Application Data\Microsoft\FS9 (and FSX) folders.
If your new AGP videocard was properly detected, you may see still further performance benefits from the safe tweaks I referred to in my post above.
If your new videocard was not detected correctly, one can directly edit the old card's information in FS9.cfg (and FSX.cfg) and in display.cfg in the FS9 (and FSX) install folders to properly report the new card's availability to FS.
PS: . :idea: Whereas most modern games and sims (FS included) generally did not attempt to saturate the video subsystem with graphics data before the PCI-Express bus was released, one can still seek better performance with AGP 4X and AGP 8X mobos and video cards in FS9 by using the tweaks above; FSX might show a even greater boost than FS9 with them implemented.
Hope this helps! :roll:
GaryGB
-
Hi Lou:
A couple of initial questions might be appropriate here before a specific reply were given: :wink:
1.) Do you have an AGP 4x or 8x mobo?
2.) Do you plan to upgrade your mobo for FSX, or stay with FS9 a while?
3.) Regardless, to optimize what you have right now, since you have AGP and are using FS9, have you tried the tweaks I posted here:
http://forums.simflight.com/viewtopic.pight=tweak
and here:
http://forums.simflight.com/viewtopic.pc&start=30
I'd be glad to provide more detailed individual suggestions upon reading your reply with the above specs. :D
GaryGB
-
Hi Bruce:
Bill is right, many excellent downloads have graciously been kept available on our behalf by Simon (A37Gnome) at his website:
http://www.stansco.co.uk/Flight_Sim/index.html
older Emma related downloads are linked to here:
http://www.stansco.co.uk/Flight_Sim/pafegory&id=4
[ EDIT ]
and newer Emma related & misc. downloads are linked to here:
http://www.stansco.co.uk/Flight_Sim/pafegory&id=7
Hope this helps! (and thanks again to Simon!) :D
GaryGB
-
Hey Pitt:
I can see from the last Pic in your post that you're going to enjoy the new FSX "living water" quite a bit! :lol:
GaryGB
-
Hi All:
Pups had raised this question also in this thread: :idea:
http://forums.simflight.com/viewtopic.p01&start=0
As I indicated there, it is likely that Richard Goldstein and Lago may still be interested in Emma Field, and that Emma's static scenery would still load and be useable in FSX. :wink:
The greater question would be whether the dynamic scenery and sounds would need to be re-programmed by Mauricio Gavioli of VistaMare Software. At first I thought it may, since there appears to be the new dynamic scenery component of cars which I assumed to be a graphic on another drawing layer over/under FSX like VistaMare was doing for Lago, then I realized after I looked at the FSX folder structures that they are AI objects like in FS9 (Peter McLeland and Holger will probably be better able to comment on this due to their extensive experience with AI in FS).
I believe I heard some very low volume "oceanic shoreline" sounds in FSX inside Joe Binka's Widgeon Radial when I was bellied up on the shoreline on St Martin, and it could just have been ongoing audio effects from the water effects in "Nick's" effects I assigned to that plane, or it could have been one of the "cones of sound" that Justin Lamb had referred to vaguely at the Oshkosh demo. If I was actually hearing a "positional environmental sound", perhaps there may be a new sound placement utility in the FSX SDK like that in FSE? That would be fabulous, Microsoft giving us a workaround for features otherwise orphaned by add-on developers! But we'll have to see if that actually exists on the DVD at release time. :roll:
And potentially important too, perhaps, would be the need to re-position Emma Field's static scenery coordinates to align with the geo-corrected location of FSX's new terrain mesh. I haven't checked this in detail, but it may be that it already is close enough to use with minimal (or any) adaptation since it is fictional in nature, already uses a flatten BGL, and any correction we need at the shorelines of Lake Cushman can be fixed with the tools in the SDK or other already existing 3rd party scenery utilities.
I personally would like for Emma to stay where she began, but would welcome seeing an "Emma North, South, East, West" etc. according to interests of other flight simmers. I don't think Lago would try to invoke a copyright infringement "Look and Feel" lawsuit against a 'freeware' FSX based re-creation of Emma Field unless they had a vested interest in doing something with Emma in the future for FSX themselves. :D
Maybe we should start "threatening" to do a re-creation just to see if Lago actually is interested in doing an upgrade (properly), but this time lets "get real" and tell them we plan to pay them for it this time! In my opinion, they should have been paid for the extensive re-programming that Mauricio did for the FS2004 upgrade; it wasn't their fault that Microsoft changed that part of the FS engine, and we probably wouldn't have had the long frustrating wait for that upgrade from a company that was apparently financially re-structuring to survive the small FS niche market's fluctuations if we had all stated up front that we were willing to pay for it back then! :?
Is there really any add-on package more dear to our hearts than Emma Field? Emma Field and the EFFC Forum is the life-blood of my FS world! Yes, it is definitely wonderful to be able to adventure off to other horizons in well-made free and commercial sceneries with their own very special qualities and comeraderie, but who would want an FSX world without our spiritual home of Emma Field still ready to welcome us home where she always was, (and hopefully not abandoned like it practically was for about a year)? :shock:
GaryGB
-
Hi Pups:
Now for the simple little tweak which may help with better sound and hard drive performance, while freeing up the PCI bus to allow more bandwidth to be available for other tasks... like video performance for people with AGP cards! :D
Note: One can probably set all PCI devices (with latency numbers initially higher than 32) down to 32 without any problems with yet another PCI latency utility, if your mobo and add-in cards are fairly new (2-4 years old). If the PCI latency speed for a device shows a "0" value, it probably cannot/should not be reset due to a manufacturer's mandate, critical (in their opinion) to the stable 'co-operation' of their device with other system components. :wink:
(This tweak is not for people with PCI-Express video cards; other non-video system components may or may not be changeable with this or other utilities, but it is still worth trying, since most PCI-Express mobos will still have PCI slots on them until more PCI-Express add-in cards become the new industry standard (remember ISA, EISA, MCA, VLB etc?).
Download "PCI Latency Tool" at: http://downloads.guru3d.com/download.php?det=951
After installed, load it into memory; then:
1.) In the 'PCI Latency Tool 3' window menu, click on "Settings" then be sure "Apply on Startup" is checked in its menu.
2.) Back at the 'PCI Latency Tool 3' window menu, check the list for video, sound, and hard drive controllers set higher than 32.
3.) Click on a listed device with a latency longer than 32, then right click it.
4.) In the pop-up menu which appears choose "Change Settings"
5.) In the "New Latency" dialog box which appears, click in the text field provided and type "32", then click "OK" to exit.
6.) Again in the 'PCI Latency Tool 3' window menu, click on "Settings" then click on "Save" in its pulldown menu item.
7.) Once more in the 'PCI Latency Tool 3' window menu, click on "Settings" then click on "Apply" in its pulldown menu item.
8.) Repeat steps 3 to 7 for each "non-0" latency device which was initially set higher than 32
9.) Finally, in the 'PCI Latency Tool 3' window menu, click on "File" then click on "Exit" in its pulldown menu item to Exit.
Now try out your new settings! :)
PS: If you have visual, sound or disk I/O problems, try moving latency back up in small, 2 unit increments (32 + 2 =34 etc.) until you find a threshold your hardware and present drivers demands.
But always be sure you try out the manufacturers latest drivers, and beware of possible shortcomings in 3rd party drivers from the web or from the Windows Plug N' Play installation process; remember Microsoft's drivers are designed to make Windows look and act stable, sometimes at the cost of individual device performance considerations.
Tweaking PCI Latency and changing Drivers for an add-in card is eminently preferable to the ill-advised desperation of backing off on system-wide DirectX hardware acceleration sliders via the Windows 'Dxdiag' utility at the 'Run' command. :idea:
Enjoy! 8)
GaryGB
-
:lol: :lol: :lol:
Glad they helped, Pups!
I'll probably have the info on the next set of tweaks posted sometime tomorrow.
The 666 was just reflecting my 'devilishly' innovative skill at 'revealing' ways to bring out the 'beast' in your computer. :twisted:
Happy Flying! :D
GaryGB
-
Hi Francois:
Wow, that was fantastic! :shock:
Thank you so much for the heads up on that wonderful aviation adventure! :D
GaryGB
-
Excellent Pups... glad to hear those tweaks worked well for you! :lol:
First, 2 quick corrections in my immediately prior post above...
Under Color Profiles it should read:
"2.) In the resulting dialog box, click on the "Save As" button and type in a new name (Ex: FS9 Color Test-1 or whatever) at the prompt, then click the "OK" button. "
Under Application Profiles it should read:
"4.) Again back at the Application Profiles dialog box in the second pick list line down under the heading "Display, color and peformance preferences", click on the picklist 'down arrow' icon, then choose your saved custom FS Color Profile name."
Now for even more excitement... A performance boost by overclocking your video card!
Here's how:
Create a custom 'Performance Profile'
1.) In the system tray, right click on Powerstrip's icon, choose Performance Profiles > Configure.
2.) Click on the "Save As" button and type in a new name (Ex: FS9 Perf Test-1 or whatever) at the prompt, then click the "OK" button.
3.) Again back at the Performance Profiles dialog box, raise each of the sliders for your video card by 5% of the existing clock speed (speed x 1.05).
4.) Click the "Save As" button, then 're-confirm' the submitted Performance Profile name you previously saved by clicking the "OK" button.
5.) Back once more at the Performance Profiles dialog box, click the "OK" button to exit.
Now we add the performance profile to the application profile:
Editing a custom 'Application Profile'
1.) In the system tray, right click on Powerstrip's icon, choose Application Profiles > Configure.
2.) In the resulting dialog box, click in the pick list line next to the "Save As" button, click on the picklist 'down arrow' icon and choose your saved custom FS Application Profile name, "Microsoft Flight Simulator", then click the "OK" button.
3.) Again back at the Application Profiles dialog box, in the 'bottom' pick list line under the heading "Display, color and peformance preferences", click on the picklist 'down arrow' icon, then choose your saved custom FS Performance Profile name.
4.) Back once more at the Application Profiles dialog box, click the "Save As" button, then 're-confirm' the submitted Application Profile name of "Microsoft Flight Simulator" by clicking the "OK" button.
5.) Click the "Close" button to exit.
Now try out your new settings!
NOTE: To tweak your FS Performance Profile settings further
If your display distorts and/or hangs at step 3 in "Performance Profile", set the Memory speed back to its default, and start increasing only the 'Core' speed initially.
If the initial 5% 'Core' increase was tolerated, repeat "Performance Profile" steps 3 through 5 above, increasing the 'Core' slider 2% more each time until visual artifacts such as 'peeling' or untextured triangles or moiré shadowing starts to show during flights. Artifacts will usually show before flights hang or Windows crashes, and Powerstrip should intercede. If not, reload the flight (or at worst, restart FS or Windows) and try adjusting your settings down 1% each trial until you find the max 'Core' overclock tolerated during an average flight, then back off 1 % more for a stability margin.
Now repeat "Performance Profile" steps 3 through 5 above, except that you may try increasing the 'Memory' slider 1% more each time until visual artifacts such as 'peeling' or untextured triangles or moiré shadowing starts to show during flights. Artifacts will usually show before flights hang or Windows crashes, and Powerstrip should intercede. If not, reload the flight (or at worst, restart FS or Windows) and try adjusting your 'Memory' settings down 1% each trial until you find the max overclock tolerated during an average flight, then back off 1 % more for a stability margin.
Once you have apparent "peak overclock tolerance thresholds" for both Core and Memory speeds, reduce the peaks for each by 1% in step 3, and save your settings as in steps 4 and 5 in "performance Profile" above, then try out a flight again to see if it is stable. If not, keep decreasing 'Memory' speed first and retesting before decreasing 'Core' speed to find a new heat tolerance threshold for both clock speeds that remains stable throughout a longer flight. That's all there is to it (in Powerstrip); there may also be other tweaks the card may allow via special 3rd party utilities, including DirectX tweaks!
Stay tuned for instructions on resetting the PCI Latency of your hard drive and sound cards for better system performance!
Hope this enhances things even further for you! :roll:
GaryGB
-
Hey Pups:
Powerstrip is non-expiring 'trialware' with a brief <10 - 30 second nag screen (gets longer over the duration of use) which appears once each time it loads. They will deserve a registration and fee for this incredible utility after they have fixed the apparent FSX incompatibility... and after you get the extra money. :wink:
The defragging with 3rd party tools is not an urgent priority, but disk (and video) I/O should be, if I may be so bold as to quote from the "FS Book Of Shoulds". :P
Try these harmless video tweaks (they should knock your sox off!): :shock:
Be sure FS9 or FSX aren't running, and run Powerstrip so it loads to the system tray.
1.) Go to the system tray and right click on Powerstrip's icon, choose Options > Adapter Information.
2.) In the resulting dialog box, uncheck "Read Only", set the "Latency" spin box number at "32", then click the "Apply" button
3.) Re-check the "Read Only" checkbox, then click the "OK" button
Now try out your new settings!
Note: You can probably set all your PCI devices (with latency numbers initially higher than 32) down to 32 without any problems with yet another PCI latency utility, if your mobo and add-in cards are fairly new (2-4 years old); move latency back up in increments if you have visual or sound problems.
See: http://forums.avsim.net/dcboard.php?az=&mode=full
and: http://downloads.guru3d.com/download.ph1#download
Later, when you're ready, take a look at:
http://forums.simflight.com/viewtopic.pc&start=15
Please note you do not have to use any of the optional settings in Powerstrip, but I would encourage trying out a custom "Color Profile" to be used in an "Application Profile" for FS9 (and FSX if you can get it to co-operate on your machine; I can't on mine yet).
Here's how:
Create a custom 'Color Profile'
1.) In the system tray, right click on Powerstrip's icon, choose Color Profiles > Configure.
2.) In the resulting dialog box, click on the "Save As" button and type in a new name (Ex: FS9 Color Test-1 or whatever) at the prompt, then click the "OK" button.
3.) Back at the Color Profiles dialog box, click the "OK" button to exit.
Now:
Create a custom 'Application Profile'
1.) In the system tray, right click on Powerstrip's icon, choose Application Profiles > Configure.
2.) In the resulting dialog box, click on the folder icon "Browse" button in the 'Application or Shortcut' area at the top left, and Browse to the root folder of your physical install location for FS9, select "fs9.exe", then click the "Open" button.
3.) Back at the Application Profiles dialog box, click on the "Save As" button, then click the "OK" button to accept the submitted "Microsoft Flight Simulator" name.
4.) Again back at the Application Profiles dialog box in the second pick list line down under the heading "Display, color and peformance preferences", click on the picklist 'down arrow' icon, then choose your saved custom FS Color Profile name.
5.) Back once more at the Application Profiles dialog box, click the "Save As" button, then 're-confirm' the submitted Application Profile name of "Microsoft Flight Simulator" by clicking the "OK" button.
6.) Click the "Close" button to exit.
Now for some real fun:
Adjusting your display for 'Better FS Graphics'
1.) In the system tray, right click on Powerstrip's icon, choose Application Profiles > "Microsoft Flight Simulator"; FS9 now loads automatically!
2.) In a full-screen 3D mode 'flight' of your choice, Press "P" to pause FS9, then Alt+Tab to the Windows desktop or press Ctl+Esc to bring up the Windows taskbar.
3.) In the system tray, right click on Powerstrip's icon, choose Color Profiles > Configure.
4.) In the resulting dialog box, click in the pick list line next to the "Save As" button, click on the picklist 'down arrow' icon and choose your saved custom FS Color Profile name, then click the "OK" button.
5.) Back at the Color Profiles dialog box with your FS custom Color Profile name now displayed beneath the "Profiles" heading next to the "Save As" button, begin adjusting the sliders for your color profile with these following starter settings
(Feel free to tinker as desired!):
"Gamma" between 0.75 and 1.25 % according to need
"Brightness" -85%
"Contrast" +30%
"Color Temperature" (unchanged: keep at default of 6500 k)
6.) Click the "Apply", "Save As", and "OK" buttons in that order to save your settings and apply them to the 3D window that FS is running in.
7.) Alt+Tab back to the FS9 window, click on the FS window, press "P" to "un-pause" FS, and in a few seconds there should be a color shift as Powerstrip 'applies' the settings to your flight.
Note: If your new color settings never "arrive" in your 3D mode FS flight window, try Alt+Tab cycling a few times in and out of FS, clicking on the FS window each time you return to it. If your settings just won't show, you probably have some memory and video driver efficiency issues, and you will have to restart your flight to see the changes applied within a few seconds after it first loads.
To tweak your FS Color Profile settings further, repeat steps 3 through 7.
Stay tuned for instructions on a cautious trial overclock of your video card (Powerstrip will allow a graceful escape from any attempted settings that don't work safely.)
Hope this helps enhance your flying experience! :D
GaryGB


The Emperor's New Clothes... or...
in Emma Field Flying Club
Posted
:lol: :lol: :lol: :lol: :lol:
Gawd, that was among the funniest tales I've read here in quite some time!
I think you've out done yourself, Chris! :D
I can't wait for the next installment... :roll:
GaryGB